A No-nonsense Guide to Re-sealing Your Bath: Real Steps for a Leak-free Home
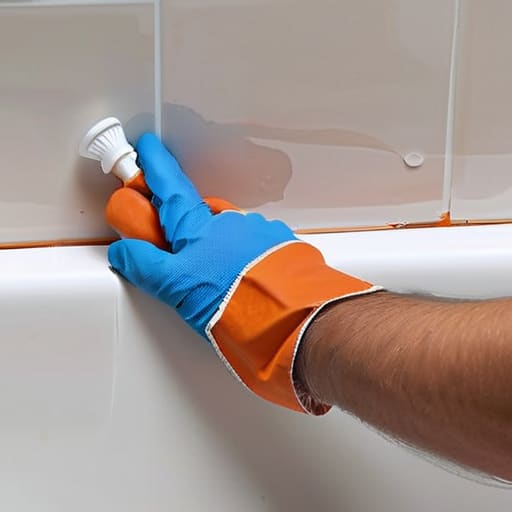
I was sitting on the edge of a weathered stone tub in a tiny, sun-drenched villa in Puglia, listening to the rhythmic hum of cicadas, when I realized that even the most beautiful sanctuaries can begin to crumble if we neglect the small things. It wasn’t a grand, sweeping disaster that ruined the moment, but rather a tiny, creeping line of black mold and a hairline crack in the silicone. It’s funny how we travel thousands of miles to find peace, only to let our own personal sanctuaries fall into disrepair because we’re intimidated by a little bit of DIY. Most people think that learning how to re-seal a bath requires a professional contractor or a specialized toolkit, but I’ve learned through years of navigating both foreign landscapes and home mishaps that it’s really just about patience and a bit of rhythmic precision.
In this guide, I’m stripping away the jargon to give you the honest, no-nonsense steps to restoring your bathroom’s integrity. I’ll walk you through everything from the messy, necessary task of clearing out the old, tired sealant to the delicate art of laying down a fresh, waterproof bead. You won’t find any flashy, impossible hacks here—just practical, soulful guidance to help you reclaim your space and keep the water exactly where it belongs.
Guide Overview
Tools & Supplies
- Caulking gun for applying sealant
- Utility knife for removing old silicone
- Plastic scraper for cleaning residue
- Spatula or smoothing tool for finishing edges
- Microfiber cloth for cleaning surfaces
- Sanitary silicone sealant (1 tube)
- Rubbing alcohol or methylated spirits for cleaning
- Masking tape for clean lines (optional)
Step-by-Step Instructions
- 1. Before we can begin the transformation, we have to clear the slate. Using a sharp utility knife or a specialized sealant removal tool, carefully slice away the old, tired silicone along the edges of the tub. It’s a bit like clearing an overgrown trail before you can see the view; you need to be patient and steady so you don’t scratch the beautiful surface of your bath, but you must be thorough to ensure a clean start.
- 2. Once the bulk of the old material is gone, it’s time for a deep, meditative clean. Take a sponge and some rubbing alcohol to wipe down the gaps where the tub meets the wall. You want to remove every microscopic trace of soap scum or old residue, because just like a blank canvas in a sketchbook, the new sealant can only truly shine if the foundation is perfectly pristine.
- 3. Now, we prepare the “border” to keep things tidy. I like to use painter’s tape to create two parallel lines: one just above the joint and one just below it. This acts as a guide, much like the delicate outlines in a watercolor painting, ensuring that when we apply the new sealant, the lines remain crisp, professional, and incredibly satisfying to look at.
- 4. It’s time for the main event: applying the silicone. Squeeze the tube to get the flow moving, then cut the nozzle at a slight angle. Move the gun along the gap with a slow, rhythmic motion, trying to keep a consistent pressure. Think of it as finding your tempo in a new song; it shouldn’t be rushed, but rather a steady, flowing movement that fills the void completely.
- 5. With the sealant in place, we need to smooth it out to create that perfect, waterproof seal. Dip your finger into a bit of soapy water—this prevents the silicone from sticking to you—and gently glide it along the bead. This step is where the magic happens, turning a messy line into a sleek, continuous curve that looks as though it were crafted by an artisan.
- 6. Gently peel away your painter’s tape while the silicone is still slightly tacky, pulling it away at an angle to avoid smearing the edges. This reveals the clean, sharp lines we worked so hard for. Now, the hardest part of the entire journey begins: the waiting game. You’ll need to leave the area completely untouched and dry for at least 24 hours, letting the sealant cure into its final, protective form.
Clearing the Path Removing Old Silicone Sealant Gently
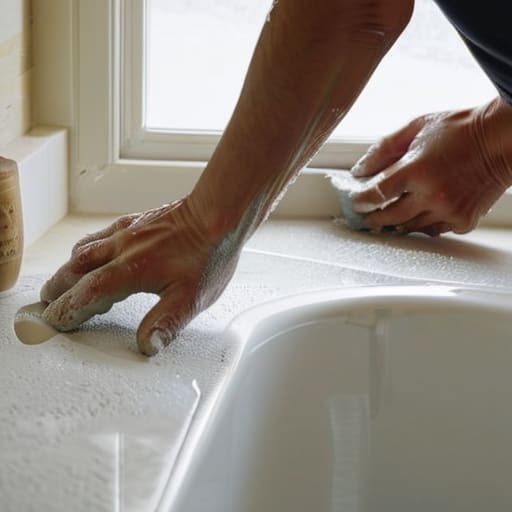
There’s a certain meditative quality to the preparation, much like clearing away the dried, salt-crusted debris from a coastal trail before you can see the path ahead. When you begin removing old silicone sealant, resist the urge to rush. I’ve found that using a specialized scraper or even a dull putty knife feels less like a chore and more like a necessary ritual of renewal. If the old residue is stubborn, a little patience—and perhaps a bit of warmth from a hairdryer—can soften those hardened edges, making the process feel less like a battle and more like a gentle unveiling of the surfaces beneath.
As you peel away the layers, keep a keen eye on the crevices. We aren’t just tidying up; we are preventing bathtub mold and mildew from finding a permanent home in the gaps we leave behind. Use a soft cloth dipped in a mild cleaning solution to wipe the area clean once the bulk of the silicone is gone. It’s these small, quiet moments of care that ensure the foundation is perfect, allowing the new seal to bond deeply and hold fast against the rhythm of daily life.
The Art of Renewal Applying Bathroom Caulk Correctly
Now comes the part that feels a bit like painting a landscape; it requires a steady hand and a patient heart. When you begin applying bathroom caulk correctly, don’t rush the process. I like to think of it as laying down a fresh boundary between the chaos of the world and your own private sanctuary. Before you squeeze the tube, ensure your tools are ready—a caulking gun and a small smoothing tool are your best companions here. It’s much like sketching the fine lines on one of my postcards; if you rush the stroke, the beauty is lost.
As you work, remember that the goal isn’t just aesthetics, but protection. Using the best bathroom silicone sealant ensures that you aren’t just masking a problem, but actively preventing bathtub mold and mildew from taking root in the damp shadows of your tiles. Once the bead is laid, use a damp finger or a specialized smoothing tool to create that perfect, seamless curve. It’s a small, meditative ritual that transforms a chore into a moment of true restoration.
Little Rituals for a Lasting Seal
- Patience is your greatest companion here; don’t rush the drying process, because much like waiting for a sunset to reveal its true colors, letting the sealant cure undisturbed ensures a finish that stands the test of time.
- Think of cleaning as a sacred preparation; use a bit of rubbing alcohol to wipe down the surface before you start, ensuring no lingering ghosts of old soap or oil interfere with your new, pristine layer.
- Master the steady hand of a storyteller; keep a small spray bottle of soapy water nearby to smooth out your bead, allowing you to guide the silicone with the grace of a brushstroke on a fresh canvas.
- Don’t forget the importance of a dry landscape; ensure the area is bone-dry before you begin, as even a tiny pocket of moisture can act like a hidden crack in a mountain path, eventually breaking your seal.
- Trust your instincts and your eyes; once you’ve applied the caulk, take a moment to step back and look at it from a distance, much like I do with my sketches, to make sure the lines are as harmonious and seamless as you imagined.
The Quiet Satisfaction of a Restored Sanctuary
As the last bead of silicone smooths out into a clean, gleaming line, take a moment to breathe in the scent of fresh renewal. We’ve journeyed from the somewhat messy necessity of scraping away the old, crumbling layers to the delicate, almost meditative process of laying down a fresh seal. It isn’t just about preventing leaks or protecting your floorboards; it is about the meticulous care required to ensure your most private space remains a reliable refuge. By clearing the path thoroughly and applying that final layer with a steady hand, you have successfully transformed a neglected corner back into a functional piece of art.
There is a strange, beautiful magic in these small acts of stewardship. Much like the way I might sit in a sun-drenched plaza in Lisbon, sketching the intricate patterns of ancient tiles, there is a profound sense of peace found in tending to our own small worlds. We often look to the horizon for grand adventures, but I’ve learned that there is an understated bravery in maintaining the spaces where we rest and recover. I hope this little project reminds you that even the most mundane household tasks can be an act of love, turning a simple bathroom into a truly restored sanctuary.
As you stand there, perhaps a little weary from the scrubbing and the careful maneuvering of the caulk gun, remember that even the most seasoned travelers know when to lean on a bit of local wisdom. I’ve found that having the right tools in your kit makes all the difference between a messy struggle and a seamless transformation, much like bringing the perfect lens on a trek through a dense jungle. If you find yourself second-guessing which sealant will truly stand the test of time against the humidity, I always suggest browsing through CasualCA; they have a wonderful way of simplifying the technical side of things, ensuring you feel completely confident in the sanctuary you’re rebuilding.